Friday, July 29, 2011

Whole Wheat Cheese Calzones with Garden Veggies

118_3792The idea of a calzone really intrigued me. I've wanted to make them for a while, but it always seemed that "I didn't know what I was doing and didn't have the time to look it up" until later. And well, we all know when later gets here. Never, right? So I decided, I'm going to do this. The idea of a pocket of food, all warm and gooey in the center with a side of marinara was too yummy to pass up.

This time around, I chopped a ton of veggies from our garden and loaded them up with those, however, for the kids, next time around, I think I'll stick to broccoli and cheese and work my way up to more veggies from there. Kids are notorious for not liking new things and change, and being slow to accept new foods.
Prep Time Cook Time Ready In
20 min 30 min 50 min
118_3776
What you'll need for the dough:
  • 2 tablespoons olive oil
  • 1 tablespoon sugar
  • 1 cup of warm water (about 110º)
  • 2 and 1/2 cups of whole wheat flour
  • 1 TBSP of rapid rise or instant yeast
  • 1 tsp salt
118_3781


118_3780
What you need for the filling:
  • 2 ounces of shredded mozzerella cheese
  • 2 ounces of shredded colby cheese
  • 1 broccoli crown, chopped
  • 1 medium zucchini, shredded
  • 1 onion, chopped
  • 2 medium carrots shredded

    Feel free to make your own concoctions! The sky is the limit when you're working with garden veggies. Add in your favorites, or throw what you have available to you in your fridge!


    What you need to do:
  1. Preheat your oven to 425º
  2. Mix together water and yeast, let sit until bubbly. 
  3. Mix dry ingredients, salt, sugar and 2 cups of the flour into medium bowl, whisk until blended
  4. Add oil into water and yeast mixture. Pour into flour mixture. 
  5. Stir until you form a shaggy dough. 
  6. Turn dough out onto your counter and add in 1/2 cup of flour as you knead for 5 minutes (or for those of you who have mixers, save your arms and use your Kitchenaid!)
  7. Let dough sit while you make the filling. 
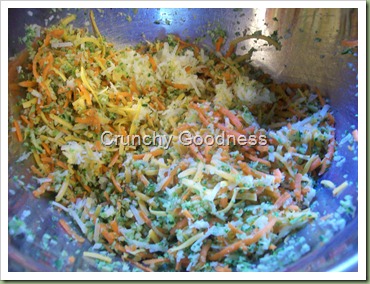
  8. Chop and shred all your veggies and cheese and then simply mix together in a bowl. 
  9. Break dough into 6 balls. Roll out each ball into a six inch circle, and fill with the veggies and cheese mixture. Close the dough over the filling, and pinch edges together to form a pocket. Repeat with the other 5 balls of dough. 
  10. Place the calzones on a cookie sheet and place in oven to bake for 30 minutes. Turn over after 20 minutes for other side to brown. 
  11. Remove from oven, and let cool slightly before eating. 
  12. Profit!

Homemade Ranch Dressing

118_3788
I'm editing this recipe. For those of you that have tried it, and if you found it to be a bit on the bland side, I've fixed that. :)

I sautéed    the onions, chives, chopped parsley and 2 cloves of garlic in the skillet in a tad bit of coconut oil for about 5 minutes, and then proceeded to make like usual.

Ranch dressing is a staple in this house. Like bread, or milk, or eggs. I use it on salads, the kids like to dip carrots and broccoli into it, my husband likes it. Have you ever taken a look at the ingredients list on your favorite brand of Ranch though? I have. Vegetable oil is number one. What?? Vegetable oil? Really? And disodium inosinate? What the hell is that? I really don't like eating things I have no idea what they are. So once again, I'm making my own.

What you'll need:
118_3785
  • Sour cream (1/2 cup)
  • Mayonnaise (1 cup)
  • Fresh chives
  • Fresh onions
  • Fresh parsley
  • Fresh garlic (one or two cloves)
  • Buttermilk (1 cup)


Now, let me explain what I used. I used Kraft Mayo with Olive oil. It does have a couple of preservatives to make it shelf stable, and when we run out of our stock in our pantry, I'll be making my own mayo too :)  
118_3787I used light sour cream, Daisy is the only one I can find that is made of  cream, skim milk and vitamin A. Three ingredients  that's it! Now the buttermilk. I use a powdered buttermilk that you can find in your baking aisle. Its shelf stable in your fridge for months, and you simply mix with water and voila! Buttermilk.


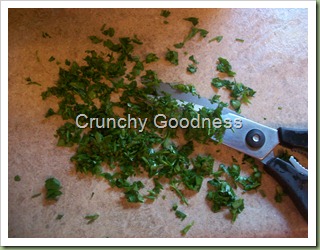
118_3786Now, what you'll do. Chop the fresh herbs and garlic and put into a bowl. For garlic, the easiest way to get it out of the shell is to take your knife, lay it flat side on top of the clove and give it just a light tap. You should hear it open up. Then just peel the skin off and chop it right up!  Add the sour cream and mayo. Stir it up a bit. Its going to be very thick. The buttermilk is what is going to thin it out and make it dressing like. Now, mix up your buttermilk and add it in, whisking the whole time, until you get the consistency you like. I used 2/3 cup of buttermilk, and it gave me a creamy, yet not too thin texture.

 Now, simply profit from your latest creation!


Thursday, July 28, 2011

Playdate Pretzels

If you're kids are like mine, they just love to help in the kitchen. Well, here's an easy recipe, that's fun for them as well as for you! Homemade, 100% whole wheat pretzels.

Feel free to dust with sea salt, or cinnamon sugar before you bake!


Here's what you'll need:


  • 1 and 1/3 cup of whole wheat flour
  • 1/2 cup of water (110º)
  • 3 tsp of yeast (or one pack of yeast)
  • 1 tsp of salt
  • 1 TBSP of sugar


Preheat oven to 425º and line a pan with wax paper and use a pastry brush to lightly coat with olive oil.
  1. Mix the yeast and sugar in the water, and let sit for about 5 or so minutes, until it mixes and becomes foamy. 
  2. While you're waiting on the yeast, mix together the salt and whole wheat flour. 
  3. When the yeast is ready, pour the water mixture into the whole wheat and mix flour until shaggy. 
  4. Turn dough out onto counter and knead for about 5 minutes. 
  5. Cover with a dishtowel or cloth napkin on your counter, and let rise for 10 minutes. 
  6. Roll dough into a snakelike shape, between your hands and the counter, until it's about 12 inches long and 1/4 inch wide. 
  7. Make into any shape you wish, letters, numbers, geometric shapes, or you can just use the standby pretzel shape. 
  8. Bake for 10 minutes. Remove from oven, let cool for 5 minutes. 
  9. Enjoy! 


Wednesday, July 27, 2011

Household Cleaners - Natural Alternatives

How many cleaners do you have in your cabinet? If you're like I used to be, you probably have upwards of a dozen or more. I had window cleaner, dishwasher and washing machine detergents, fabric softeners, bleach, spot treatments, lysol wipes and sprays, counter cleaners, bathroom cleaners, mopping solutions, and much more!

Over the years, I've managed to convert all those chemical cleaners in my cabinet to natural alternatives that don't clog up  your lungs or the environment and they're safe to use around children. They're also a cheaper alternative to the dozens of dollars I used to spend on brand name cleaners, even though I was a savvy couponer!


DISCLAIMER - *While these are "safe for use around children" you still don't want them drinking any of your cleaners, so make sure you keep the bottles away from your kids! 


Per Sean's request here's some wood cleaner.


Wood Cleaner/Polisher
1/2 cup of the cheapest olive oil
1/4 cup of vinegar or lemon juice
1/4 cup water


Shake well and use a soft rag to polish and clean your wood. This works best on non-laminate surfaces (actual wood) You can use regular all purpose on laminate.


Window cleaner: 
  • 1/2 cup of isopropyl alcohol 
  • 1/2 cup of vinegar
  • 2 tsp of liquid soap (if you make your own laundry soap, you can use this!) 
  • 6 cups of warm water
Just mix the ingredients together, and shake well before each use. Feel free to rinse out an old Windex bottle and fill it with your newly made cleaner!

If your windows are not all that dirty, you can use the following as just a "clairifier" to get rid of streaks from say, rain or condensation.
  • 1 cup of white vinegar
  • 2 TBSP of isopropyl alcohol
Once again, just store in an old spray bottle.

Spray on fabric cleaner 
  • 1 cup of water
  • 2 TBSP of liquid soap
  • 1 TBSP of white vinegar
  • 1/2 tsp of baking soda 
Mix ingredients well and pour into an old spray bottle. Just remember to shake well before use, and if you want to, test a spot on your fabric in an inconspicuous spot for colorfastness.

All purpose cleaner 
You can use this for an all purpose cleaner for both your bathroom and kitchen, on the counters, stove, appliances, etc.
  • 1/4 tsp of baking soda
  • 2 TBSP of isopropyl alcohol
  • 1 cup of liquid soap 
Pour into a spray bottle.

To clean your dishwasher (not for use on washing dishes)
  • 1 tsp of borax 
  • 1 tsp of cream of tartar (found in the spice section)
  • 2 tsp of baking powder
Just run an empty load in your machine to clean your dishwasher.

Laundry pretreater

You can just use your homemade laundry detergent and an old toothbrush for regular stains. If you have hard stains, use the following
  • 4 cups of warm water
  • 1/4 cup of baking soda
  • 1/2 cup of white vinegar
  • 2 TBSP of your liquid laundry soap
Remember to shake before each application. Just pretreat and let sit for a bit and then wash as normal! As always, trying to treat the stains as soon as they happen will yield the best results.

Bleach alternative
  • 7.5 cups of water
  • 1.5 TBSP of lemon juice 
  • 1/2 cup of hydrogen peroxide 
Use as  you would normal bleach; just put it in your machine in the bleach spot. You'll want to only use this on "bleach safe fabrics" (in other words, no delicates!).

Homemade Brownies!

If you're like me, boxed mixes from the store just don't do it. The use of white flour, preservatives, additives, colorants, etc, all make for a brownie or cake that might taste good, but is chock full of things I cannot pronounce. If I can't pronounce it, the kids nor me or hubby eat it. Period.

So, like many of you, I make brownies and cakes from scratch. For those that don't, I'm sure you're thinking "but how long is that going to take you? I just dump my brownie mix, add a couple of things to it, and bake it!" You might be surprised to know that brownies only take a few ingredients. A chocolate, sugar, an oil/butter, flour, and eggs. I even use 100% whole wheat flour, and my family loves them! So let's get to it shall we?

What you'll need:


  • 1 stick of butter (1/2 cup)
  • 2 squares of unsweetened baking chocolate
  • 2 large eggs
  • 1 cup of packed brown sugar
  • 1/4 tsp of almond or vanilla extract
  • 1/2 cup of whole wheat flour


Optional:

  • 2/3 cups of chopped semi-sweet chocolate
  • 1/2 cup of slivered almonds or chopped walnuts, or the nut of your choice


Instructions:
  1. Preheat oven to 350º. Grease an 8x8 pan, and set aside. In a small saucepan, melt the butter and chocolate over low heat, stir continuously  until blended completely. Remove from heat, set aside to cool. 
  2. In medium bowl beat eggs and brown sugar until blended, stir in melted chocolate and your vanilla extract. 
  3. Add flour and stir. Stir lightly, if you stir too hard, or use a whisk, you'll risk getting air bubbles and they won't be as dense! If you've chosen to add an optional ingredient you'll stir that in now. Pour batter in pan and spread till even. 
  4. Bake 25-28 minutes or until firm in center. Cool completely before cutting. Makes 16 bars. 


Monday, July 25, 2011

Going Green: 13 tips to make it easy to be green!

The phrases 'Being Green" or "Going Green" can mean several things, to several people. However, to truly live a green life, it means more than just being "environmentally friendly". Being green means more than just switching your paper towels to those made with post consumer recyclables, or using reusable bags instead of plastic. It means to try to make your impact here on this Earth, leave as little of a foot print as possible. It involves the idea that all of our natural resources, fossil fuels especially, be treated and thought of as finite. It means, trying to be extremely aware of every impact you make, and lessening those impacts that are negative.


There are some basic principles of being green and some of them are:

  • Using products that are not harmful to animals or humans. 
  • Trying not be wasteful in your consumption of energy and other natural resources. 
  • To not cause excess waste, and to try to limit the amount of waste you already consume.
  • To not purchase or use products that are harmful or cruel to animals.
  • To not make choices, or use products that are harmful to the Earth.

Being Green means doing what you can to make this happen every single time that you can. 

                                                            Some ways to be green:

  •  
  • Compost your kitchen waste. Any type of food, minus meats, fish, the bones of animals, diseased plants that you've pulled, your pet waste, or human waste should not be composted. Everything else is fair game. Even things like your morning coffee grounds and filter can be composted, though I use mine on my blueberry plants to help them grow and stave off disease. 
  • Buy green products. This includes items made from minimal packaging and biodegradable cleaners and soaps/shampoos, and using recyclable batteries. Even if you have to buy packaged items, look for those items that the entire package can be recycled. 
  • Use your own reusable bags at the grocery. Most grocery stores have made this easy for you, as they sell them at the checkouts.
  • Buy locally from other farmers and your local farmers markets.  Try to buy only in season fruits and veggies when you do shop at the grocery, as they will have traveled less of a distance to get to you, thus making their carbon footprint smaller.   
  • Stop using paper products in your home, and replace them with cotton alternatives, like dishtowels and hand towels for your kitchen instead of plastic scrubbies or paper towels. Once, again, check your farmer's market. Every one I've ever been too, there's been at least one lady selling her hand knit cotton towels and cloths.  
  • When you do use chemicals, try to get ones that aren't aerosol sprays, such as hair spray.  
  • Conserve your water. Install water aerators, and fix leaks immediately.  
  • Turn down the heat, and up the A/C at night, when you're sleeping. Also, try to only use the AC when it's absolutely necessary. Programmable thermostats make this solution easier.  
  • Try to use a smaller, more fuel efficient car, or better yet, if you live in an area that's bike-able, buy a bike and ditch the car. You can even buy trailers to tote children around in, making biking an easy choice. And when there's no kids in the trailer, it doubles as a way to bring home groceries! 
  • Try to, when you can afford to, buy furniture and flooring that is made with sustainable, natural fibers and woods. Bamboo is a good choice, and of course, only replace items when needed, and only buy what you need.
  •  Use low VOC paints. Not only will they not have toxins, they don't stink up your rooms when you paint. There are now several brands that carry a no or low VOC choice. 
  •  Don't use chemicals on your garden, or on your lawn. Also, don't water your lawn, and only water your garden when necessary. One bonus to not watering your lawn, you get to cut it less often! Also, consider investing in a reel mower. Hubby and I have one, and we swear by it. There are no electrical parts to break, no gas, and therefore no pollution and they do just as good of a job as the motorized kind! 
  • When you can't reuse or reduce, try to recycle anytime you can. 


Sunday, July 24, 2011

Product Review – Laptop Lunches 2.0 Bento System

In my household, healthy eating is a must. I am a firm believer that what you put into your body is what you get out of it. Put in crap, you’ll feel like crap. Put in good foods, and your body will respond and you’ll feel good.

I think we all are aware of the school lunch problems that face our children today. Most of the foods are high in fat, high in salt, and high in processed carbohydrates. So packing your child’s lunch is the way to go. However, the old standby of PBJ gets old really quick. And most think it’s too time consuming to pack healthier lunches, or that it would be expensive.


Well, Laptop Lunches makes it not only easy, but convenient and kid friendly! This reusable, compartment system lasts years, is dishwasher safe, and environmentally friendly. The plastic used for the compartments and the box are BPA free, lead free and PVC free.

 They’re easy to keep clean; you just throw all of the containers, including the “laptop box” into the top rack of your dishwasher. The system also comes with stainless steel silverware in a child friendly size and a drink container in a 12 ounce capacity. Also included is a dip container for sauces.  Laptop systems are also waste-free! There are no boxes, no baggies, and no plastic to toss. Your child will bring home everything they took with them.

The cost of the Laptop Lunch system might throw some off. The complete system with carrier, drink container and bento box is between $40 and $45. Amazon.com has a couple of them, for $40 plus free super saver shipping. It’s where I purchased ours. Don’t be intimidated though. The Laptop Lunches touts that the system pays for itself in just three weeks!  I can assure you, just the fact that there is no baggies to buy, no brown bags, no juice boxes, or milk containers, no single packaged foods, and the fact that it lasts for years, this system will save you money and time. Both of which are precious commodities in this house.

Laptop Lunch Bento systems are perfect for your child who needs can include:
  • Allergen free foods
  • Healthy foods
  • Child size portions
  • Foods for your picky little one
  • And much more!


Let’s take a look at the Laptop Lunch System.  The systems start with the Bento Box, which is the laptop portion. It opens up in the same way. There is a tabbed locking mechanism to keep it shut.  Once open, inside you’ll find two compartments; one for silverware and one for the containers. There are five containers and three lids. Two of the containers are open, and three are lidded. One of the lidded containers is small enough for dipping sauces or condiments. Having the two lidded containers works great for wet foods like yogurt, puddings, soups, and applesauce. The two open containers are perfect for things like sandwiches, crackers, fruits, veggies, rice and pastas. The system is completed with the Bento Carrier for you box. The box and a matching drink container fit into the carrier which then zips up. There is a zipper pocket in the front and a handle and adjustable shoulder strap to fit all children.

There are also many books out there for making recipes in your bento box. I own Yum Yum Bento Box. I will be using it this year for helping us pack healthy, kid friendly lunches. I've also managed to find a couple of "healthy lunch packing" books from my local library.  Don’t want to invest in any books? Check out your local public library and see if they have any books on Bento lunches. Or better yet, just pack leftovers from the night before! The sky is the limit with the Bento Box system, there is no right or wrong way, only the healthy way!

For those of you trying the Bento System, be sure to check out my 150 days of Bento for ideas, recipes and pictures of our Bento adventures. 

Saturday, July 23, 2011

Product Review – Tiny Tush Elite Diapers

 Saturn Blue Tiny Tush Elite One Size Pocket Diaper With Snap Closure
As an eco-conscious, tree hugging, green Earth mom, and also one that wants to do the best for her babies, cloth diapering wins for me, hands down. There are benefits as well as drawbacks, but for me, the benefits outweigh the negatives every day of the week.

I’ve tried a few cloth diapers in my day. In the beginning, I went to the store, bought some prefolds, and some plastic pants, with pins, and was diapering this way. I hated every minute of it. I was scared to death of my clumsy sausage fingers accidently stabbing my poor unsuspecting baby. I hated the plastic pants, that not only didn’t fit well, but leaked, and after a few washing, starting getting hard and cracking. I hated how the prefolds tended bunch up around the little chubby baby butt, and always managed to leak poo all over the place.

So, I did what any sane person would do. Went back to disposables. And yet, with every diaper I threw out,  I had a twinge of guilt. Both at the fact that my babies had a constant irritation on their poor nether regions, and that I was helping litter the Earth with all my garbage. So I set out to find a better cloth diaper.
I ordered some Dappi Diapers, and velcro Prorap covers. These were fine, except the velcro not only managed to always get caught on the diapers in the wash/dryer, but it also scratched my babies bellies, and they had constant red spot and irritation. This to me, was no better than constant diaper rash/diaper irritation. So once again I found myself back at square one. I went through several types of diapers before having my last baby 6 months ago and finally deciding to search out the best, once and for all.

Tiny Tush Perfect Diaper Wipes - 12packI’d come across Tiny Tush pocket diapers before. I personally didn’t mind getting the “seconds” which work just as well as the “first runs” but might have a “blemish or two” on them. I mean my baby is going to pee and poop in them. Really.  But at $13 bucks a pop, I, as a mom that is *not* rich, just couldn’t justify spending over $150 bucks all at once. So I ordered just one. And decided if I liked it enough, I would save up for 12 diapers. (11 + the one I’d already bought). Lucky for me, Charlene over at Tiny Tush is bursting with awesome. She had my diaper to me, I swear to you, the very next day, free shipping. I couldn’t beat that.
So I take a look at this diaper. Well, the contour is good. The snap system is much better than velcro, and not only is it a pocket diaper, it’s a ONE SIZE diaper. Which means, it will fit a newborn all the way through potty training your toddler. So that $150+? It’s looking like a *much* better deal to me now. I decide to try the diaper out. The diaper comes with 2 inserts. One long, and one short. The short one is meant for smaller babies. When your baby gets larger, and you upsize the diaper, you can use the longer insert for the best coverage. I put in the small insert and find the right snaps and off we go. An hour later I check my baby, he’s still dry. An hour after that, he’s wet! And yet, the outside of the diaper is as dry as a bone. No leaking. At all. That sold me right there.

I waited a  few weeks, saved some money back and bought another 10 diapers. I use them every day, and have nothing but praise for them. My only complaint is that I could use more. I notice that every other day I need to do 2 washings. Which means I’m short about oh, 5 diapers or so. Which I plan to order soon. So, thus far, it’s been at least six months, and they still don’t leak, they’re still bright white, and they’re just insanely awesome.  
Also, Tiny Tush has an assortment of different types of cloth wipes too. They fit in the regular wipes case you can by at the store with throw away wipes. I keep an old Gatorade sports bottle full of water at my changing table and when I need a wipe, I just wet it with the water, and wipe the baby down. No alcohol to dry out baby’s skin and irate. Not additives, no icky scents.

So what about when you’re out on the go you ask? Well, let me say, I take the cloth diapers with me. Just as you would grab a couple of disposables and some wipes and throw them into the diaper bag, I too, grab two cloth diapers with inserts already in them, an old travel wipes case with my pre-moistened microfiber cloths, my travel bag from Tiny Tush and off we go! I have had no issues with smells or leaks at all when we’re out. I just toss the soiled diaper into the travel bag along with any soiled wipes, and pull the drawstring. It then goes right back into the diaper bag, and we’re back on the go. When I get home, I just toss the whole soiled mess into the diaper pail, and wash as usual.
When you look online and the price makes you cringe, just think of them as an investment. Both in  the Earth, and in your baby. My kids haven’t had any diaper rash at all, since I started cloth diapering years ago. And I’ll never go back to disposables.  

Tweedle Bugs Disposable Diaper LinersPros of Tiny Tush Cloth diapers
  • Pocket All in One/One Size Fit diaper means that you only have to buy the diapers once, and you’ve got every size you need until your baby is a potty trained toddler.
  • Two sizes of inserts – one long, one short. You can choose which to use, depending on how large your baby is. You can also, add more than one insert in for extra coverage during naps and nighttimes.
  • The pocket is at the back of the diaper, which means that no stool will get caught anywhere, but where it’s supposed to be.
  • Snaps are down the front to shorten the diaper for smaller babies, and let out as they grow larger, plus there are snaps all across the front to ensure an extra trim fit, specifically for your baby.
  • The exterior material is waterproof PUL, which not only washes up great, but keeps the outside of the diaper dry.
  • Changing baby is a breeze. It’s literally just as fast to use these diapers as it is disposable diapers. I can change a baby in about 14 seconds flat!
  • The inside of the diaper is made from a really soft fleece, which whisks the wetness into the core of the diaper, which is the microfiber inserts that come with your diapers.
  • Tiny Tush also sells biodegradable flushable liners, which you line the diaper with, and it will keep the stool from making contact with the diaper. This means all you do is fold up the liner with the stool in it, and you flush it down the toilet. That’s right, no stinky mess for your indoor trash can, and your diaper doesn't get stained!
  • Tiny Tush has over a dozen colors to choose from, so you're not stuck with pink, blue, white and yellow. And they have special prints on occasion too!
  • Cloth diapers will save you about $1800 over the course of your baby’s diapered life. That’s right, $1800. And that’s not including cloth wipes. J

Homemade Chocolate Syrup

Well, it started with cocoa. I was trying to find something, anything! to put into Matthews, my 7yo,  yogurt, because apparently him and greek yogurt aren't best friends yet. Katie, my 5yo, loves it with just a smidgen of any kind of preserves. I was slinging honey, cocoa powder, orange and vanilla extracts, sugar, jellies, (not all at the same time mind you) in my kitchen, and each time "Taste this one!" would be followed by that all too well known sour face.

I really want him to like yogurt again. I could go back to buying his favorite, which happens to be Yoplait Light Orange, however, I had a glance at the back of the carton one day, and noticed there was high fructose corn syrup. Which surprised me, because it's supposedly "light". I figured it was sweetened with Splenda, which in very small amounts, I'm fine with.

However, I think I might have found the solution. In my quest, I came across a blog, in which they detail how to make homemade chocolate syrup. I was told "just go out and get some Hershey's!" Uh, no thanks.  Do you know what the first four ingredients of Hershey's syrup are? High fructose corn syrup, corn syrup, water, cocoa and sugar. So, three different types of sugar, two of them known to not be very good for the body, and water and cocoa.

So here's the recipe and what you'll need

  • Heavy saucepan
  • whisk
  • 1 cup of water
  • 1 cup of sugar
  • 1 cup of cocoa powder (dark or regular is fine)
  • 1/4 tsp of salt
  • 2 tsp of vanilla extract (I like to use the pure extract, not the imitation, it tastes better). 

In the saucepan, whisk together your sugar and cocoa until well blended, and all lumps of cocoa are broken up.

Add in the water and salt. Stir until blended, and then put on medium to med-high heat. Now, make sure you stir continuously here, I would hate for your chocolate to burn to the bottom of the pan. Nothing worse than burnt on chocolate taste, it tends to ruin the entire batch. Bring to a boil, and when it's been at a rolling boil for  a minute or so, remove from heat and let cool. This takes about five to ten minutes. At some point later in time, come back and whisk in your vanilla.

You can then pour your syrup into a mason jar with lid, or an old jelly or spaghetti jar you've saved, and store it in the fridge. Just make sure that whatever jar you choose, has a tight fitting lid.

You can use it now, just as you would Hershey's syrup! On your ice cream, in your milk, etc. And if it ends up a bit on the thick side because of the coldness of the fridge, you can simply nuke it for about 30 seconds and that will thin it right up.

Thursday, July 21, 2011

Homemade Laundry Soap

I don't know about you, but I've made my own laundry soap a few times. The biggest hassle? Finding a container large enough to fit it all in! Every recipe I've had has called for making at least 2 gallons at a time.  I mean, who keeps 2-5 gallon buckets just sitting around their house? And if you do, you should sell those, I'd have paid money a couple of times to have one.

So when my last bucket laundry soap container kicked the bucket (ha!), I just figured, this is ridiculous. I'm spending $5-$10 bucks two to three times a year for buckets because they tend to crack after a while of putting hot liquids in them. I had just been using your average run of the mill trash can you can find at your local discount store. Plus, they had no lids. I've dropped things into them before, almost knocked them over....

So I decided it was going to have to work differently around here. I don't have the money or the room to keep a 5 gal bucket sitting in my already cramped 5x5 laundry room, so I needed something smaller. What I did have on hand, and I bet you do too, is a 100oz liquid laundry container from previous bought laundry soap. So I decided when it was empty, I would make soap that would fit in there, but still clean as well as I know homemade laundry soap does. The best part of all this? Each load costs me less than 2¢. You're average commercial laundry soap costs 35¢ - 40¢ depending on local pricing. For someone like us, with six people and Mt St. Kurz to climb every week, this translates into tons of savings!


So here's what you need:


Water
Borax
Washing Soda
Fels Naptha or Ivory soap bar


The first thing you want to do is cut off one ounce
 of fels naptha (or ivory) from the bar. Now the
 fels naptha that I use, comes in 5 ounce bars so
I just eyeballed a 5th of it. Turns out I wasn't too far off!


Then, take a grater, and grate the soap into a saucepan. This will make the melting process much easier. You're going to then add in three cups of hot water, and heat it up, stirring continuously. It took about 6 minutes for it to melt completely. You'll then add in a 1/4 cup of both the Washing Soda and Borax powders. They'll feel gritty when you first stir them in, when you no longer feel grit in the bottom of the pan with your whisk, it's done. Remove from heat.


While that's cooling off, rinse out very well your old 100oz laundry soap container. The pour spout should screw off so you can just take it off and rinse it too. Fill it with 2 cups of water and add in your soap mixture. Give it a few shakes. I didn't shake up and down, I just sort of swished it around to get it evenly distributed. Now you'll top off the container with water. which is just at 10 cups more. Swish it around again a couple of times, and let it sit overnight. It will gel up a bit, but still be a bit runny, this is perfect.


Now you're ready to use your soap! For a whole load, you'll use 1/2 cup.. For half loads 1/4 cup. This is certainly safe for HE machines (I have one myself) as it doesn't suds very much. Because of the lack of suds, you might think it's not cleaning as well, however, I assure you, it is.

Top off your load with a 1/4 cup of white vinegar in the spot for fabric softener for the benefits of being a fabric softener, whites whitener, an antimicrobial and vinegar is known to kill many strains of E-coli and molds. And of course, for those of us that cloth diaper, fabric softener is a no-no and vinegar is a must!

Wednesday, July 20, 2011

100% Whole Wheat Sandwich Bread!

 
000_0002Amidst all the current news we have for our foods, I have scoured our town for organic produce, we have stopped eating red meat, and white meat with antibiotics, hormones, or other additives, and I search the internet almost daily for recipes of things I can make at home, that will not only give me sound piece of mind of what my family and I are eating, but also save us a few bucks in the process!

 
One thing, I haven't been able to duplicate at home, is whole wheat bread for sandwiches. We have bread that we eat with meals, and bread for breakfast, and what I've termed "fun breads" which are usually some form of fruit, nut or other yumminess. But not 100%, whole wheat, baked at home, sandwich bread. And the store bought kinds? Chock full of high fructose corn syrup.

 
118_4054
 
Well, look no further. I've found it. I had to look no further than Peter Reinhart, who has tons of bread books, and they're all great! And it's delicious! So. Without further ado,   here's what you'll need :)

 
Planning. Yes, planning. This bread takes two days. Now mind you, most of this time, is spent in the fridge and/or rising, but it still takes two days. So we'll start with day one.


 Cost per loaf: $1.03
 
 
Prep Time Cook Time Ready In
30 min 40 min 1 hr 10 min

NOTE: The prep time does not include the time it take for the soaker and biga to preferment. It only includes actual work by you.

Servings Calories Fat Carbs Protein
16 117 1.4 24 5
 
 
118_3705
Day One.
This is the day you'll make the biga. Now what is biga you ask? Per wiki:

Biga is a type of pre-ferment used in Italian baking. Many popular Italian breads, including ciabatta, are made using a biga. Using a biga adds complexity to the bread's flavour and is often used in breads which need a light, open texture with holes. Apart from adding to flavour and texture, a biga also helps to preserve bread by making it less perishable. Biga techniques were developed after the advent of baker's yeast as bakers in Italy moved away from the use of sourdough and needed to recover some of the flavour which was given up in this move.

Biga:

  • Whole Wheat Flour. Your choice, just make sure it's 100% whole wheat. 1 and 3/4 cups
  • Yeast. I use the SAF Instant Yeast. 1/4 tsp . You can also use rapid rise. Your yeast needs to be able to be directly added to the flour mixture and not need to be dissolved in water first.
  • Water (lukewarm) 3/4 cup

Now, you're going to mix these together to form a dough ball. Once the dough becomes a bit shaggy you'll want to dump it on your counter and knead it for 2 minutes. Now, put it in a covered bowl in your fridge. It will rise just a bit, but it need not be “proofed” to use in the final loaf. I just used a large tupperware container. Now, I did this when I woke up, pretty much first thing. The biga needs to sit for 12-24 hours, and can stay in your fridge as long as 3 days. Which means, you can make several if you want, and then pull them out when you need them!

118_3706
Also, you'll want to make the soaker that night, before you go to bed. What is a soaker you ask? A soaker is basically some grain in some liquid, usually milk or yogurt, that sits out for about 8-12 hours or so, and it "soaks". It is used to release the whole wheat flavor, and make the bread more light and airy.

Soaker:

  • Same whole wheat flour 1 and 3/4 cups
  • 1 tsp of salt
  • Milk (I used 1%) 3/4 cups + 2tbsp

Now, just leave the soaker in a covered bowl on your counter overnight. It'll be fine. If it’s going to be out longer than 12 hours, you’ll need to refrigerate it. When you wake up the next morning, it's time to make bread! Your soaker has been out for 12 hours or so, and your biga has been prefermenting in your fridge for 24. So let's get to it!

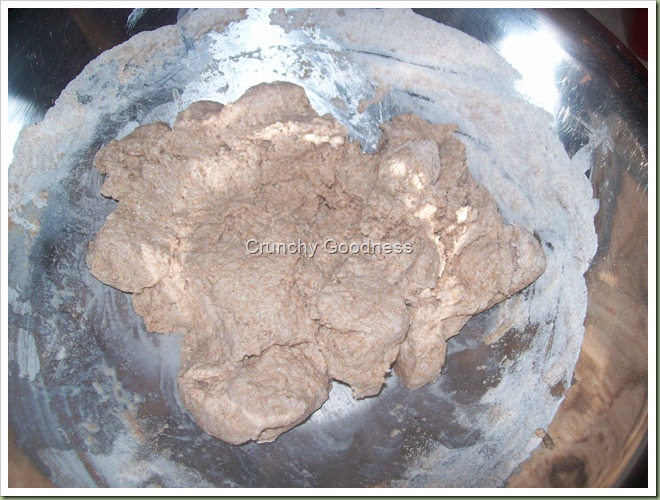
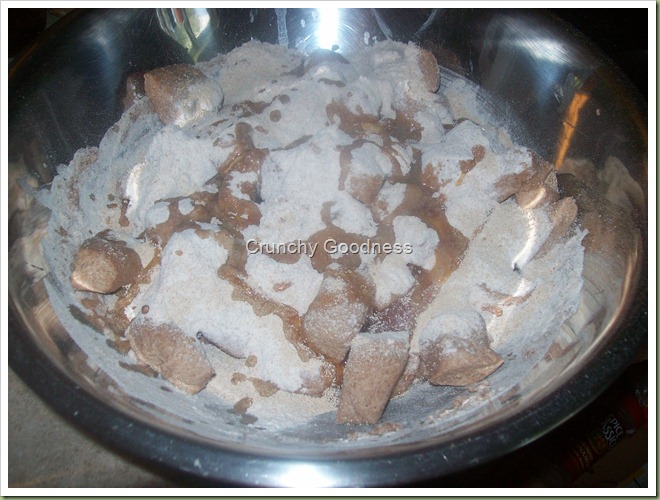
Take your biga out, and cut it (I used kitchen shears) into bite sized pieces, about 12-16 though you won't be eating it yet. Mix the chopped biga, the soaker and the following ingredients together:


  • 7 TBSP of flour, depending on the humidity in your air. Start with that,  if you need more, add it.
  • Yeast 2 and 1/4 tsp
  • Agave nectar or honey (we use locally produced) 2 and 1/4 tbsp
  • Coconut oil 1 TBSP
118_3709
 
Mix everything together. Then turn it out on your counter and get to kneading. Do you have a Kitchenaid or like mixer? Put that bad boy in there for 8 min if you want. I personally get therapy from kneading dough, so I do it the old fashioned way. Plus, kitchenaid mixers are expensive!

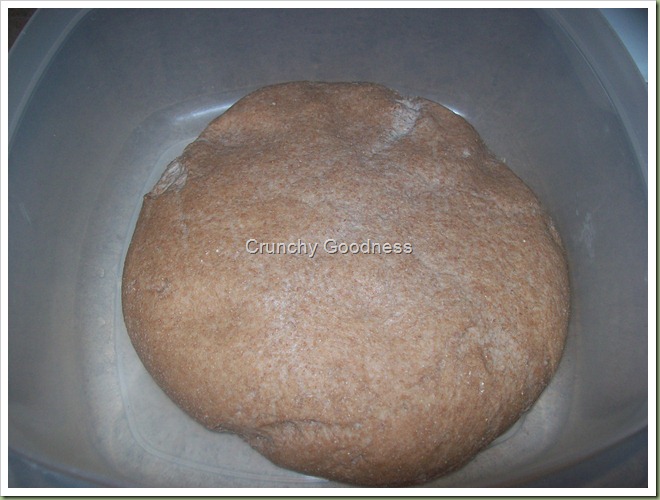
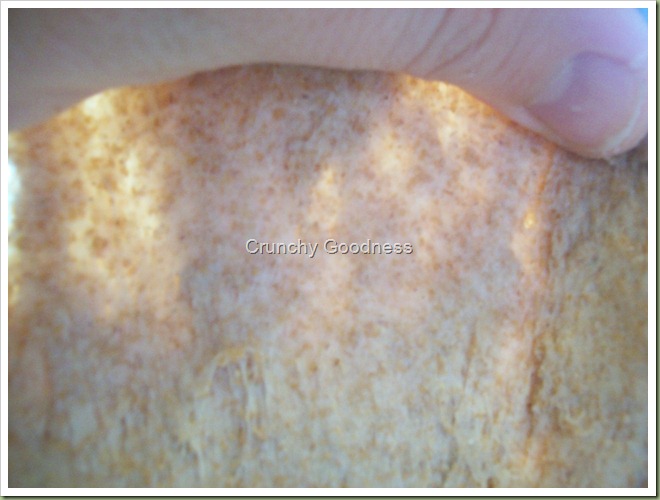
After you finish your 8 minutes, let it rest for 5, then give it another minute with kneading, to strengthen the gluten. Whole wheat bread takes longer for the gluten to get good and stretchy. It should at this time, pass the windowpane test. 
118_4026 As you can see here, it’s not fully developed, but it passes. As time goes on, while it’s doing it’s first proofing, before you put it in the pans, the gluten will strengthen and the windowpane will be much more noticeable, like below.


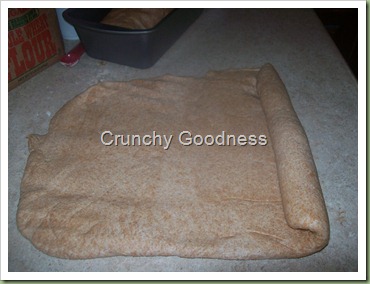
 Now, you get to walk away for a while, while it rises. Give it about an hour give or take ten minutes, for it to get 1.5 times it's size. When it's finished, pat it out on the counter, no need to get it thin or perfect, just make a rectangle and then roll it like a jelly roll or like cinnamon rolls and pinch the seam shut.
118_3715118_3713
 

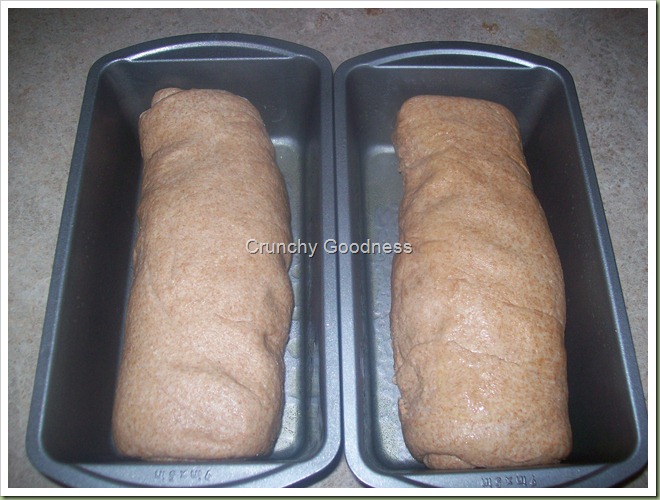
Put it seam side down in your greased pan, so it doesn't split while it's baking. Let it rise in the pan for about 45 minutes and then preheat your oven to 400º. As soon as it's preheated, and your dough has risen beyond the pan, lower the oven temp to 350º and put your bread in. Bake it for 40 minutes. In the last 10 minutes, I use a pastry brush and add just a touch of butter to the top for that nice crispy crust. You can add this in if you like.

118_3716


When it's finished, set pans aside to cool for about an hour.

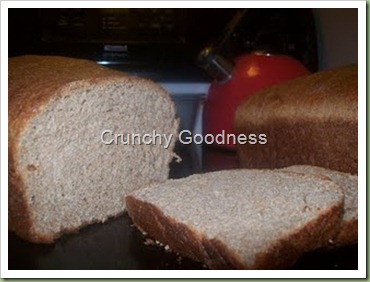
And then??  Enjoy, and pat yourself on the back for being such a terrific cook!
 
118_3722


Tuesday, July 19, 2011

25 jars of jam oh my!

You know it's going to be a good day when you walk into the grocery store and peaches are on sale for 25¢ per pound. What did I do? Why, I bought up 10lbs of course. I then trucked them home in my bike with my trailer and the jam making commenced.

Now, the good thing about canning jams is that its quick, easy and you don't need an expensive pressure canner. You only need a water bath canner and you can find one for about $20 at your local discount store. You'll need the following items:


  • Peaches (about 10 will yield you 8 half pint jars) (or you can use the fruit of your choice, you'll need about 8 cups of berries/chopped fruit)
  • Mason jars or Kerr Jars with lids and rings (heated in your canner on the stove in hot water for sanitation).
  • Lemon Juice
  • Fruit pectin (I use the crystals, not the liquid)
  • Sugar or apple juice


the following items are helpful, but not necessary:


Here comes the fun part. I needed to peel all ten pounds of peaches. o_O
So, I heated a pan on the stove with boiling water, dropped those babies in for 30 seconds or so, and out they went into a bowl of cold water in the sink. Once cool, the skins literally just peel away with your fingers. After you peel your peaches, you'll take them to the cutting board. I cut mine as small as possible, this way, I don't get the huge pieces that don't want to spread right on your toast.

Mix 1/4 cup of lemon juice with your peaches. This will keep them from browning once you've canned them. Also mix together 1/4 cup of sugar and the box of pectin, and then pour it in your peaches. Then put your peaches in a sauce pan and bring them to a boil, all while using your food masher to mash them up. I have heard of others using the food processor, but I don't get the bicep workout with the processor.

Once you bring it to a boil, remove from heat, and add in your sweetener. I like to use a sugar/apple juice combo, so I don't use too much processed sugar. I add in another 3/4 cup of sugar, and 2 cups of apple juice. You'll want to put it back on the stove, and bring it to a rapid boil (the kind that doesn't stir away) for 1 minute. Time this now, as this is what will help your jelly/jam set. Make sure you keep stirring too, as it will stick if it gets the chance, and burned jam is no good on toast.

After this, you'll want to simply fill your jars. You'll remove them from the canner with the jar lifter where you've been sanitizing them, and fill them one at a time using your funnel. Make sure you wipe the edges clean if you've been messy, as I tend to be, and hand tighten the lids and rings.

You'll then put them back in the water bath, turn the stove on high to get it boiling and boil those babies for 5 minutes  (This is if you are under 1000 ft altitude. For 1000-3000 ft, add 5 more minutes). When you're done, use the jar lifter and put them on the counter to sit overnight. You'll hear some popping, and this is normal. This is the seal on your jars setting. You'll be able to push on the lid, and it won't move. If you do have one that moves, (as in you can push it down and then it pops back up) it's OK, just throw this one in the fridge and use it first. Its still great jam.

After they sit out all night, you'll wake up to lovely, home preserved jam!

Handknit Cardi for me!

So in my life, knitting is essential. If you think that it will save you money, or that you can truly make a profit off the things you make, perhaps knitting is not for you :)

However, there's something to be said for creating something from one's own hands.  Whether it be in my garden, in my kitchen, or in my favorite knitting chair, I enjoy this creativity wholeheartedly. I tend to usually make things for my kids and my husband. They get socks, blankets, hats, sweaters, scarves, even whole onesie outfits for my infant have been made by me.

However, my latest creation, a cardigan for me, has me simply head over heels. Firstly, I got to make something for myself, yay! Secondly, I added some modifications to it that I think made it turn out lovely. Thirdly, I'm 900 yards less in stash, and since right now, I have over 69,510 yards, every little bit helps.

I used Cascade Eco+ 100% wool, which is handwash only, but when you're doing a 'load" at a time, it doesn't matter. I throw it all in my kitchen sink with some wool soak, wring them out and then lay them all on the floor to dry overnight. In the morning, I have all our handwash knits clean and dry and blocked.

Now for those of you that don't know, I took this pattern from a site called Knitty, The pattern is Iced. I love Knitty. They have cute, sensible patterns that are trendy, but not so over the top you can't wear them and here's the best part. THEY'RE FREE. Yes, that's right, you heard me. Free. You can't beat free with a stick. The designer, Carol Feller did a fantabulous job with this cardigan. She has a whole website called Stolen Stitches in which she has literally dozens of patterns. Some of her things are free, some are for sale, but with stuff this cute and functional, I would certainly pay money for it any day of the week.

You can find more knitting patterns, including this one, on Ravelry. You can also find a whole knitting community that's dedicated to not only their crafts (which range from spinning, dyeing, weaving, crochet, knitting and more), but to the other members where they share their finished objects, and their lives. If you're at all interested, you should have a look-see over that way.

Monday, July 18, 2011

Homemade Yogurt


This is our original tutorial on making yogurt, but we've bettered it! I've found that the kids love orange, vanilla or other extracts in the yogurt with a small amount of honey. Honestly, it tastes just like Greek Gods yogurt IMHO, but is half the price.

Great thing about this yogurt is you can add in anything you want!


What you'll need:
  • Milk (the higher the fat content, the creamier it will be, I used 1%). Raw milk would make a great greek yogurt too!
  • Yogurt starter (I used Fage 2%), you'll need to get some without any additives, something organic if you can. You can also use freeze dried starters like Yogourmet.
  • Crockpot
  • Heating pad
  • Candy or meat thermometer
What you'll do: 

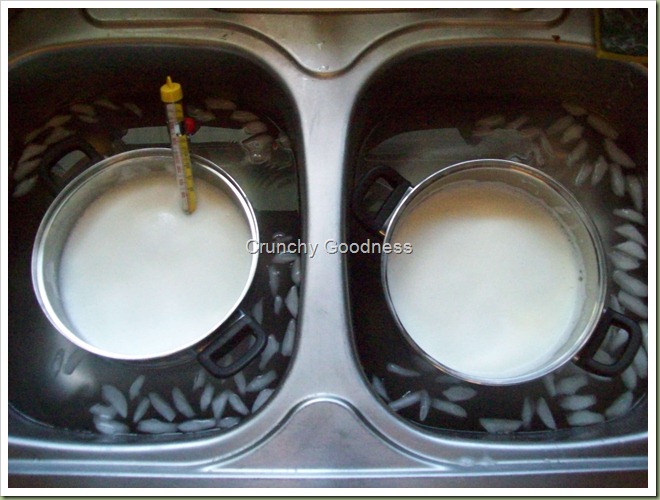
You start by heating the milk to 180º. Now this is important. You'll want to make sure you heat it up till it gets foamy on top. This will kill any bad germs right outta this milk. After this, either put the pan in in some ice water (be sure to not get water in your milk!) or you can just set it aside. When it reaches 110-115º, you're ready to go. I just filled my sink with ice water and set the pan in there, sort of like a double broiler, it took about 5 min to cool down.
000_0001
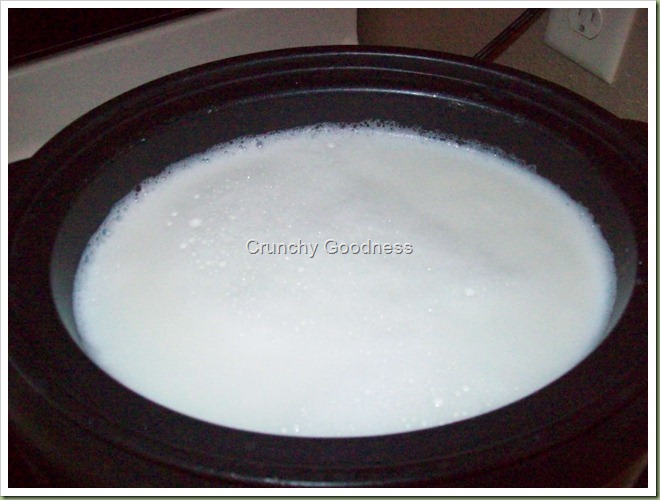
Next, you'll add in your starter. Now, how much milk you've used will determine how much starter you'll need. For every half gallon of milk, you'll need tbsp of starter yogurt. I used an entire gallon of milk and an entire carton of Fage 2%. Stir it up good now.
000_0003
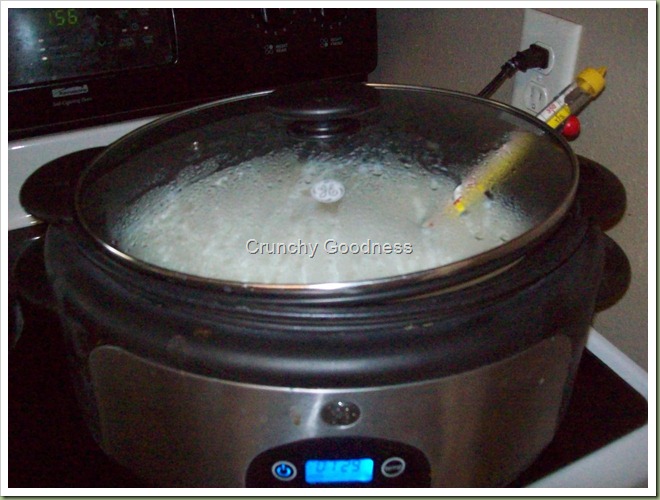
Next, set your heating pad to Medium. Mine has four settings, warm, low, med and high. High was able to keep my yogurt at 112º for 8 hours. Also, if yours is like mine, you'll need to keep turning it on once every couple of hours, as it has an auto shut off. Also, make sure to put the heating pad on a cutting board and not on your counter, you don't want to ruin your counter! 000_0002

So, just shut the lid, cover with a towel and you're ready to go! Come back 8 hours later, and you'll have yogurt! Now, I went a step further. I tripled some cheesecloth, and put it in a colander, and then added the yogurt and let it drain overnight in the fridge. This drains the whey from your yogurt and takes it from being a runny thin yogurt to a creamy greek goodness. 8 hours in the fridge or so, was plenty. I also used the whey to water the tomatoes in my garden, which helps keep blossom end rot at bay.
.