Showing posts with label From the Kitchen. Show all posts

Thursday, December 19, 2013

Simple and Delicious Peppermint Pinwheels

You guys. Oh you guys! Doze cookies! Let me tell you, these cookies are delicious. Like....I mean, I'm a cookie girl, but these are really good. And the options are endless with colors! I chose red and green with red and green sprinkles because it was "fun" for the kindergarten class I was cooking for. Want something a bit more classy? Use red or green only and leave the other "white". Need them for a baby shower? Use pink and blue and fun baby sprinkles!

For the holidays they are nice wrapped up as a small gift, or put with other candies and goodies into  a tin for a larger gift. Have fun!


Directions

Sift together the flour, salt and baking powder and set aside. Cream together butter and sugar together in another large bowl. Add egg, vanilla, milk, and peppermint extract, and beat until incorporated. Gradually add the dry mixture, beating until combined. Remove half of the mixture from the bowl. Add red food coloring, beating until fully combined. This is where I threw on gloves and used my hands to mix it up.  On a sheet of waxed paper, roll out dough to form a large rectangle, about 1/4-inch thick. Repeat this step with the other half of uncolored dough with green food coloring.

Now, slide the red dough on top of the white dough. I simply took both of them and just slapped  them together sammich style. Then I trimmed the edges and patched an area with the trimmed dough so it would be more uniform. Roll dough into a log, creating a swirl effect. I actually rolled up short logs (rolling from short end to short end) and after three rolls, I cut down along the width, removed the roll and repeated this process. You could roll from short end to short end, but my dough was so large, picking up a log of that size would have been a chore.

If the dough starts to break or crack while rolling, don't sweat it. Just pinch it to patch it up. :) 

Now, the trick here is to let the dough chill. I didn't need this until the morning, so I let it chill overnight. But an hour or so would work if you're pressed for time. 

Go preheat your oven to 375°. Now for the fun part! I took some sprinkles, used them on the dough, then rolled it over a little and repeated the process until it was covered. Then you can slice into oh, quarter inch or so slices. I got about 60 cookies with this recipe. Just place them about an inch apart and bake for about 12 min. 

Thursday, November 7, 2013

No Knead Bread


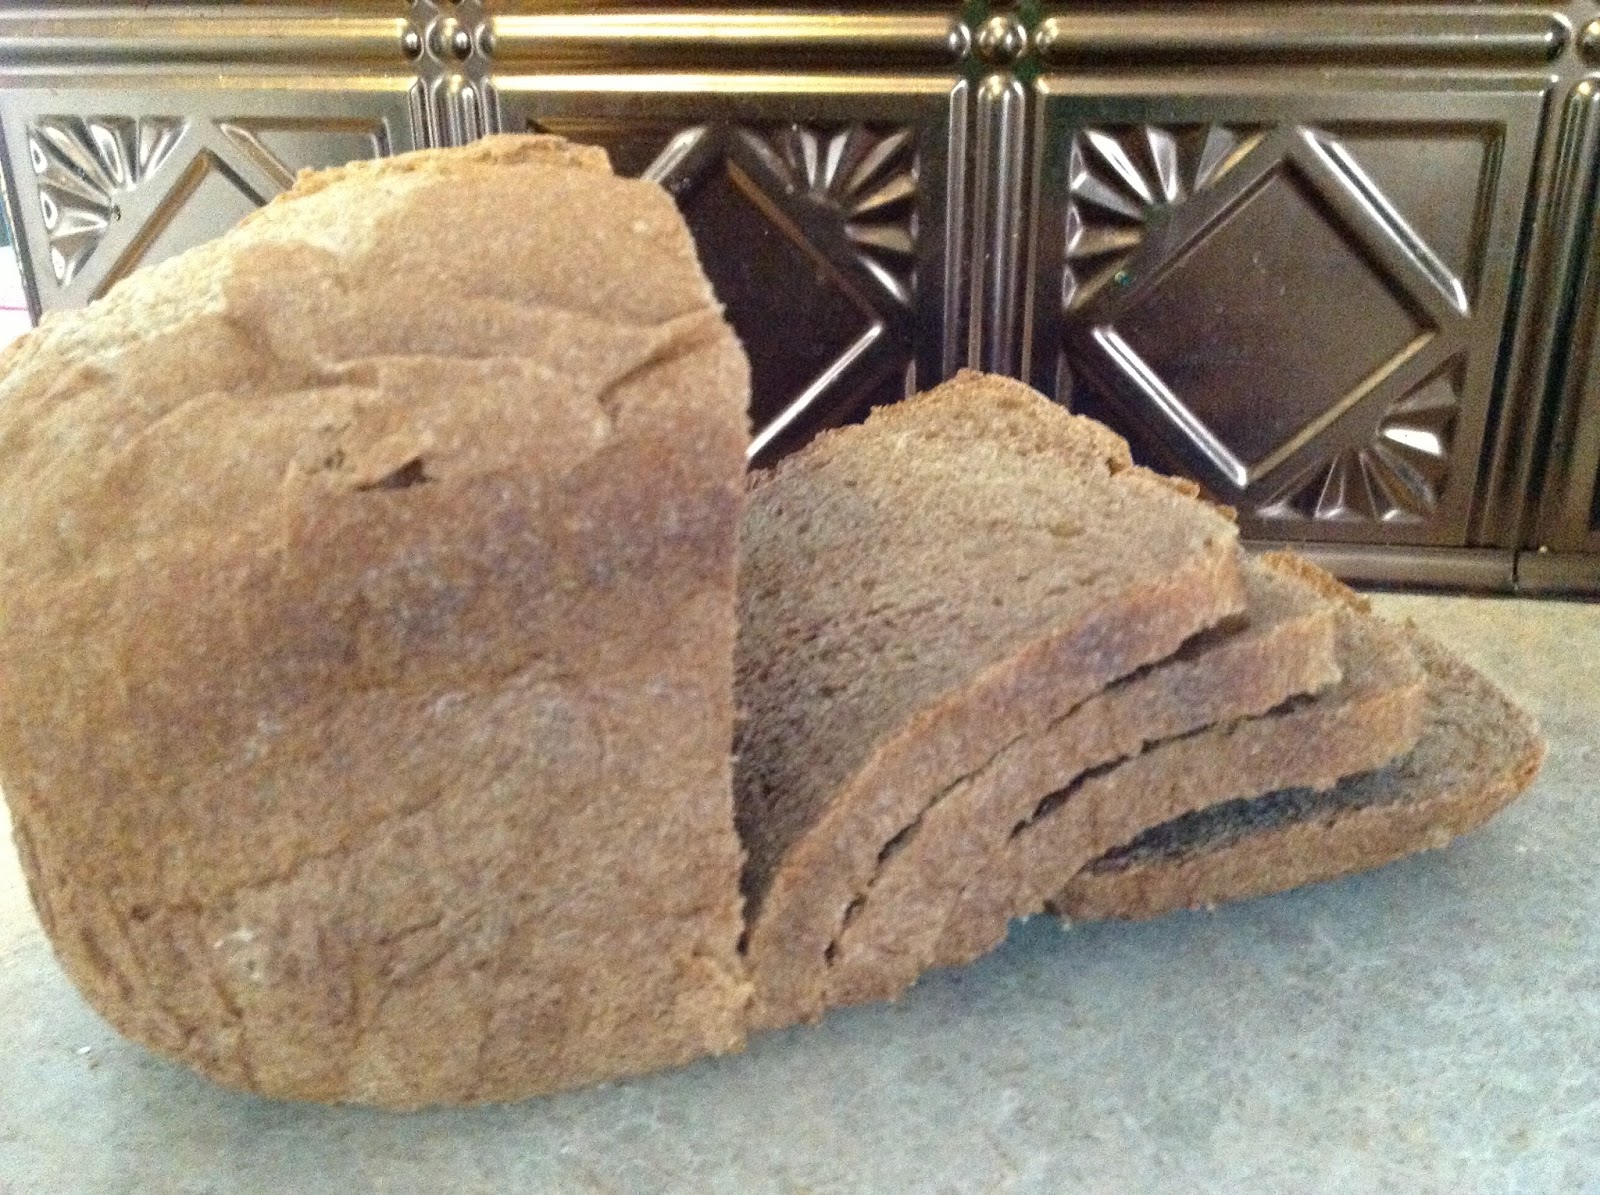
I have been searching for ever it seems to find the perfect bread recipe. I found one for my bread machine, it makes lovely light whole wheat bread that is great for sammiches. The downside? It takes four hours and thirty eight minutes. Which is fine, but you know, sometimes, life gets in the way. Sometimes, I wake up late and don't have four hours before we need to eat. I know, I know, first world problems. But problems nonetheless. So I came across this "peasant bread" that you don't knead and I'll be honest, I was skeptical. I thought, this is going to come out as dense as a rock and will taste like crap.
Boy was I wrong. Like...more wrong than I could have imagined. This bread is light, fluffy and comes out with a crunchy dense crust like you wouldn't believe. Best part is, it takes about 5 minutes to mix, another 30 to rise, 5 minutes to put into pans, 30 min for the second rise and 40 min for the bake. So, total of 1 hour and 50 minutes, which officially makes it the fastest ever yeast bread I've made. We've used it for sandwiches, french toast, toasted toast, and just plain eating with a dinner. Everyone loves it! And with almost no work, I can make this every day. I still make the bread machine bread, just not as often.
Now, something to remember, this bread calls for quite a bit of water. It's going to look and feel pretty sticky. That's completely normal. It really does use 1 cup of water for every 2 cups of flour. Just trust in the recipe. :)

What you'll need:
  • 4 cups of unbleached unbrominated flour
  • 2 cups of water
  • 1.5 tsp salt
  • 1 TBSP sugar
  • 2 TBSP of coconut or similar oil
  • 2 tsp of instant yeast (I use 2.25 tsp of yeast because we're high up in altitude)

What you'll do:

  1. Mix together water, sugar, salt and oil.
  2. Add in flour and yeast, mix well. You can just sort of "fold it over" with a spatula. Its too thick to mix with a spoon and too thin to pick up with your hands.
  3. Let sit for 30-45 minutes until doubled in size, then punch down and separate in half.
  4. Transfer each half to a greased bread pan, I like to use the glass ones, they transfer heat a bit more evenly, but metal would work too. Try to use a smaller pan, no larger than a 1.5 lb loaf.
  5. Let sit for about 30 min until doubled again. Preheat your oven to 375 and bake for 35-40 minutes.
  6. PROFIT.


Tuesday, October 22, 2013

Pumpkin Scones


Winter is coming.


And it's true isn't it! You can't throw a rock without hitting something pumpkin flavored. Believe it or not, I'm actually not a fan of pumpkin. I don't like pumpkin pie, I sure as hell don't like pumpkin drinks. But! I love Pumpkin Scones. Probably because I've not yet met a scone I don't like. Or...a pastry of any kind for that matter. I do have an unnatural affection for baked goods.....

Anyway. So this recipe. Hands down, best pumpkin scone I've ever had. Of course, my little secret, which I guess won't be so secret now is to use half hard white wheat, and half pastry wheat. The pastry wheat makes it light and fluffy and melt-in-your-mouth goodness, while the white wheat keeps it from blowing away in a hard wind. Topped with a super easy spiced glaze, you'll be making these all the time. 

What you'll need: 

Scones: 
1 cup white wheat flour
1 cup pastry flour
½ cup sugar
1 tbsp baking powder
½ tsp salt
½ tsp ground cinnamon
½ tsp ground nutmeg
¼ tsp ground cloves
¼ tsp ground ginger 
6 tbsp of super cold butter
½ cup of pureed pumpkin
3 tbsp of milk 
1 large egg

Spiced Glaze: 
1¼ cup powdered sugar
2 tbsp milk
½ tsp of pumpkin pie spice

What you'll do: 

  1.  Preheat oven to 425º. Grease or line baking sheet. 
  2. Combine flour, sugar, baking powder, salt, cinnamon, nutmeg, cloves and ginger in a large bowl. use a fork to cut the butter into the dry ingredients until mixture is crumbly and no chunks of butter are left, set aside. 
  3. In another bowl, whisk together the pumpkin, milk and egg. Fold wet ingredients into dry ingredients, and form the dough into a ball. Pat out dough onto a lightly floured surface and form into into a 1 inch thick rectangle, about three times as long as it is wide. Use a pizza cutter to slice dough into three sections the short way, then two sections the long way. Cut each square in half diagonally. Place triangles on sheet and bake for 14-16 minutes or until light brown. Cool on wire rack. 
  4. When scones have cooled, mix the glaze and drizzle over scones. 
  5. PROFIT. 


Thursday, October 3, 2013

Delicious Apple Crisp

So what do you do when you have 250lbs of apples? Why you make apple crisp of course. And applesauce. And apple butter. And stewed apples....and....well you get the idea. 

This is one of our favorite desserts. Every year we not so patiently wait for the apples to ripen so we can eat this delicious dish. Give it a whirl and I bet you'll love it too! The best part is that if you can your apples in just water (peel, then slice, the waterbath in just water, or a light syrup), you can cut the cook time to 30 minutes  The whole house smells yummy for days after making this!


What you'll need: 

10 medium cored, sliced and peeled apples 
1 TBS of white wheat flour
1 cup of granulated raw sugar
½ cup of water 
1 teaspoon of cinnamon
½ tsp of nutmeg
1 cup of quick oats
1 cup of packed brown sugar
¼ tsp of baking powder
¼ tsp of baking soda
½ cup coconut oil or melted butter


What you'll do

1. Preheat oven to 350º. Grease your 9x13 pan with butter or lard so the apples don't stick. Slice, peel and core your apples and lay them down in the bottom of the pan

2. Mix together tablespoon flour and sugar. Sprinkle evenly over apples. Pour the half cup of water evenly over the apples. If you've canned your apples, you can omit the water. 

3. Mix together spices, oats, brown sugar, baking powder, baking soda and coconut oil. Sprinkle that evenly over the top of your apples. 

4. Bake at 350º for 45 min. If you're using canned apples, you can reduce that time to 30 minutes. 

5. OMNOMNOM and enjoy! 


Thursday, August 8, 2013

Soaked Whole Wheat Tortillas, even if they are crooked!


So they're not perfectly round like the store bought ones. That's a good thing right? I mean, that just shows you they're authentic! This recipe is so easy, I'm betting my nine year old could work it. Really. Ok wait. My husband could work it. And that's saying something because he can't cook. At all. 

I made tortillas once and they sucked. They were gummy, they tasted like cardboard and they were stiff and not at all like you think a tortilla should be. Who knows what I did wrong, I haven't the slightest, but whatever it was, it was enough to turn me off of them. Or so I thought.

In our quest to eat as naturally as possible, I came across soaking your grains, beans and nuts for optimal digestion and health. I won't launch into a tirade about why you should soak your grains, but here's how I look at it. Number one, humans have been doing it (until recently that is) for thousands of years. There are actually a lot of other (healthier) cultures that still do. Secondly, it doesn't take any more time, so why not? I mean, it can't hurt you to soak your grains, and I've got nothing to lose, not even time, so why wouldn't I do something that takes absolutely no energy, time or effort on my part? Granted, it's not as easy as pulling something off a shelf and shoving it into a cart, but healthy eating is never that easy. That's how Americans have become the most obese people on the planet, and I want no part of that. Thirdly, yes thirdly, I've actually seen improvement since I began soaking our grains. I'm losing weight, and don't crave carbs the way I used to. And I don't feel gross like there's a brick of crap in my belly when I eat them now either.

There's also nothing better than a beautiful loaf of whole wheat bread to entice you too!

So here's what you do!

Soaked Whole Wheat Tortillas

Makes 8 awesome rounds!

Ingredients:
2 cups of whole wheat flour
1/4 cup of coconut oil
3/4 cup of water
1 Tbsp of apple cider vinegar
1 tsp of salt
arrowroot powder or cornstarch for rolling out


Mix everything but the salt and arrowroot. Mix it well, in a bowl. Throw a plate or something over the bowl to keep it from drying out and let it sit on your counter for at least 8 hours. I made mine at about 8 am this morning and let it sit until about 5. You could always leave it overnight and then roll it out the next morning.


2. Cut it into 8 equal pieces. Roll out each piece until it seems like it's too thin. I promise you, it's not. :)


3. Throw that bad boy in a heated skillet on about medium heat, and let it cook maybe 45 seconds on each side. You'll want to watch for it to bubble up in places, and when it bubbles up, you know it's time to turn. Then, turn and cook on the other side. Take a look at the video above to get an idea of when to turn.


4. Enjoy!

You can even make them and freeze them for future use if you are like me, have six people and eat them once or twice a week!


Tuesday, August 6, 2013

Soaked Whole Wheat Bread

So. I had a whole post on why soaking your wheat is a good thing. The science behind it, why it can help your body, and how it makes a great loaf of bread! But then as I punched the backspace key, I thought you know what? If you're looking for soaked whole wheat bread recipes and you found mine, you already know the benefits of soaking your wheat. You already know that until the last century every society soaked their grains beans and nuts. You are already willing to soak your wheat, but simply need a recipe! But if you do want to know more about soaking your wheat/beans/nuts, Da'nelle over at Weed Em and Reap has a great blog that tells us all about soaking our grains. She also has a great tutorial on making whole wheat bread, but it's by hand and I needed something for the bread machine. We go through 10 loaves or so a week not to mention other wheat things I make, and I like to use the bread machine for efficiency.

So, I have one for you. And let me tell you. I was super surprised. I started making whole wheat bread a couple of years ago. I got a bread machine and every day or so, I would make 1-2 loaves of bread. Only on rare occasions did we buy store bought bread. I make all sorts of things in there. Hamburger buns, cinnamon roll dough, italian/french bread doughs, and regular sandwich bread. Needless to say we eat some serious wheat in this house. But I noticed that when I ate wheat, I felt like crap. It felt heavy in my stomach and caused some mild nausea. So I decided instead of jumping on the low-carb, no carb gluten free bandwagon, I was going to keep wheat because humans have been eating it since about 6000 BC when we learned we could use rocks to grind it up. So. Onto the bread.

Now, Here's the thing. All you have to do is mix your wet ingredients and your wheat. Here's my recipe. This makes a 1.5lb loaf in the bread machine.

3 and 1/3 cups of whole wheat bread flour
1 Tbsp and 1tsp of Coconut oil 
2 Tbsp of apple cider vinegar
1 and 1/3 cup of water
3 Tbsp of honey
1 tsp of salt
2 Tbsp of Arrowroot powder
2 and 1/4 tsp of yeast 

Now real quick like, I know you're like what the heck is arrowroot powder? (or maybe you know! I didn't). It's like Cornstarch but with cornstarch its of course, made from corn, and 90% of the corn in the US today is GMO and we try to stay away from all GMO's around here. So arrowroot it is.


So. You just mix up your wheat, oil, honey and vinegar and mix it. Now I have 3 and 1/3 cups of wheat. 3 cups is your starting place. On average I use 3 and 1/3 cups. But sometimes I use a little less, and sometimes a little more. It will depend on the humidity level of your kitchen how much wheat you need that day. What I do, is turn on the machine and then add the 3 cups of wheat and let it mix a bit. Then I add a little at a time until the dough starts to pull away from the sides of the machine but it still a bit sticky.


I use the bread machine to mix it in. It doesn't have a mix cycle per se, but I just toss it in there and turn it on the first cycle and let it mix. Then I just turn it off. Iffn' you want to you could just leave the dough in there for the required 8 hours (or up to 48 hours). When I make two loaves I sit them out on the counter uncovered. Don't worry, it's completely safe. :)


Then, after it's sat for the amount of time, you simply add in the salt, the arrowroot powder and the yeast and turn your machine on "white bread" setting. And honestly, it's as simple as that! I thought soaking my bread would take me longer. I thought it would be extra work. It's really not. And let me tell you. Before, I switched us over to white wheat because even though I *love* the taste and texture of whole wheat bread and that dark caramel color it has, it wasn't rising right in my machine. Now I know why. The loaves rise beautifully now. They're also super yummy. Also also, they don't give my belly any issues now either! So what are you waiting for!!! Get to baking!


Friday, July 26, 2013

Beef and Veggie Hand Pies


Yummy meat hand pies, it's what's for dinner! 
OMG. Hand pies? I realize, it's sounds kinda gross. You could call it a...hot pocket if you wanted to I suppose, but I think that name has been taken and then tradmarked, so I'll stick with hand pies for now. My first experience with them, was quite a while ago. I ate what was called an "irish hand pie". It is the cousin to the original version of what Nebraskans out here call a "Runza" or what is also called bierock. 

So. Basically have you have this pocket (closed of course) of meat and veggies that is baked and then consumed in all it's yumminess. 
Here's our version :) 

Ingredients for the dough.

What you'll need for the dough: 
1 cup of whole wheat flour
1.5 cup of whole white wheat flour
1 cup of warm water
1 tsp of salt
1 tbsp of sugar
1 tbsp of coconut oil
2.25 tsp yeast.

What you'll need for the filling: 
1lb of pastured grass fed beef
2 small onions
1 tbsp (about 2 cloves) of minced garlic
8 large mushrooms chopped
1 medium yellow squash
1 cup of mozzarella cheese

(If you're soaking your whole wheat flours like we're doing, you'll want to soak the water and flour overnight on your counter and then continue with the recipe.). 

Now, I toss all this in my bread machine in this order: water, salt, sugar, oil flour and then yeast. I throw that bad boy on "dough cycle" and get to cooking the meat and veggies.


Sauteed Veggies

We added in squash because we had a bunch,
but you could add in just about anything you could think of! 

Next, take your pan and throw a tbsp of coconut oil it and saute your veggies. I used onions, mushrooms, chopped garlic, and squash which aside from the mushrooms, all came from the garden. I got those nice and yummy and then added in the meat. I gave it a good stir and browned it up while mixing the flavors thoroughly. 


By this time, your dough should be done. It needs to rise, so if it' hasn't yet, let it rise and then punch it down. Cut it into 8 equal parts and then roll each one out into a circle. Add in some of the filling, and top with cheese. Now you could use ricotta cheese mixed with the meat too, we didn't have that, so I used what I had on hand.

Make sure to just keep cutting in halves
until you have the number of pieces you want.
You could always do more or less depending on your needs. 

Make sure to crimp all edges for a nice closed pie
 so it doesn't come open when you bake it. 
Add in any fillings you like, we added
in cheese!


Take a fork, fold over the pocket and crimp the edges closed with the tines of the fork. Sprinkle some cornmeal on a pan and lay your hand pies down on top. The cornmeal keeps the dough from sticking. 
Bake at 375º for about 25 min and then serve up with pizza sauce, or any other sauce you can think of! 

Tuesday, December 4, 2012

Chicken Stock

Have you ever wondered what makes soups so delicious? Well, it's all in the broth baby

And that broth is comprised mainly of chicken stock. (Or vegetable or beef stock).

So what is chicken stock exactly? Chicken stock is a great way to make use of the whole chicken. When you go to the grocery and get bone in chicken or a whole chicken, don't toss the remaining portions once you've removed the meat! Instead, use up every little bit you can, and make stock for soups and stews.


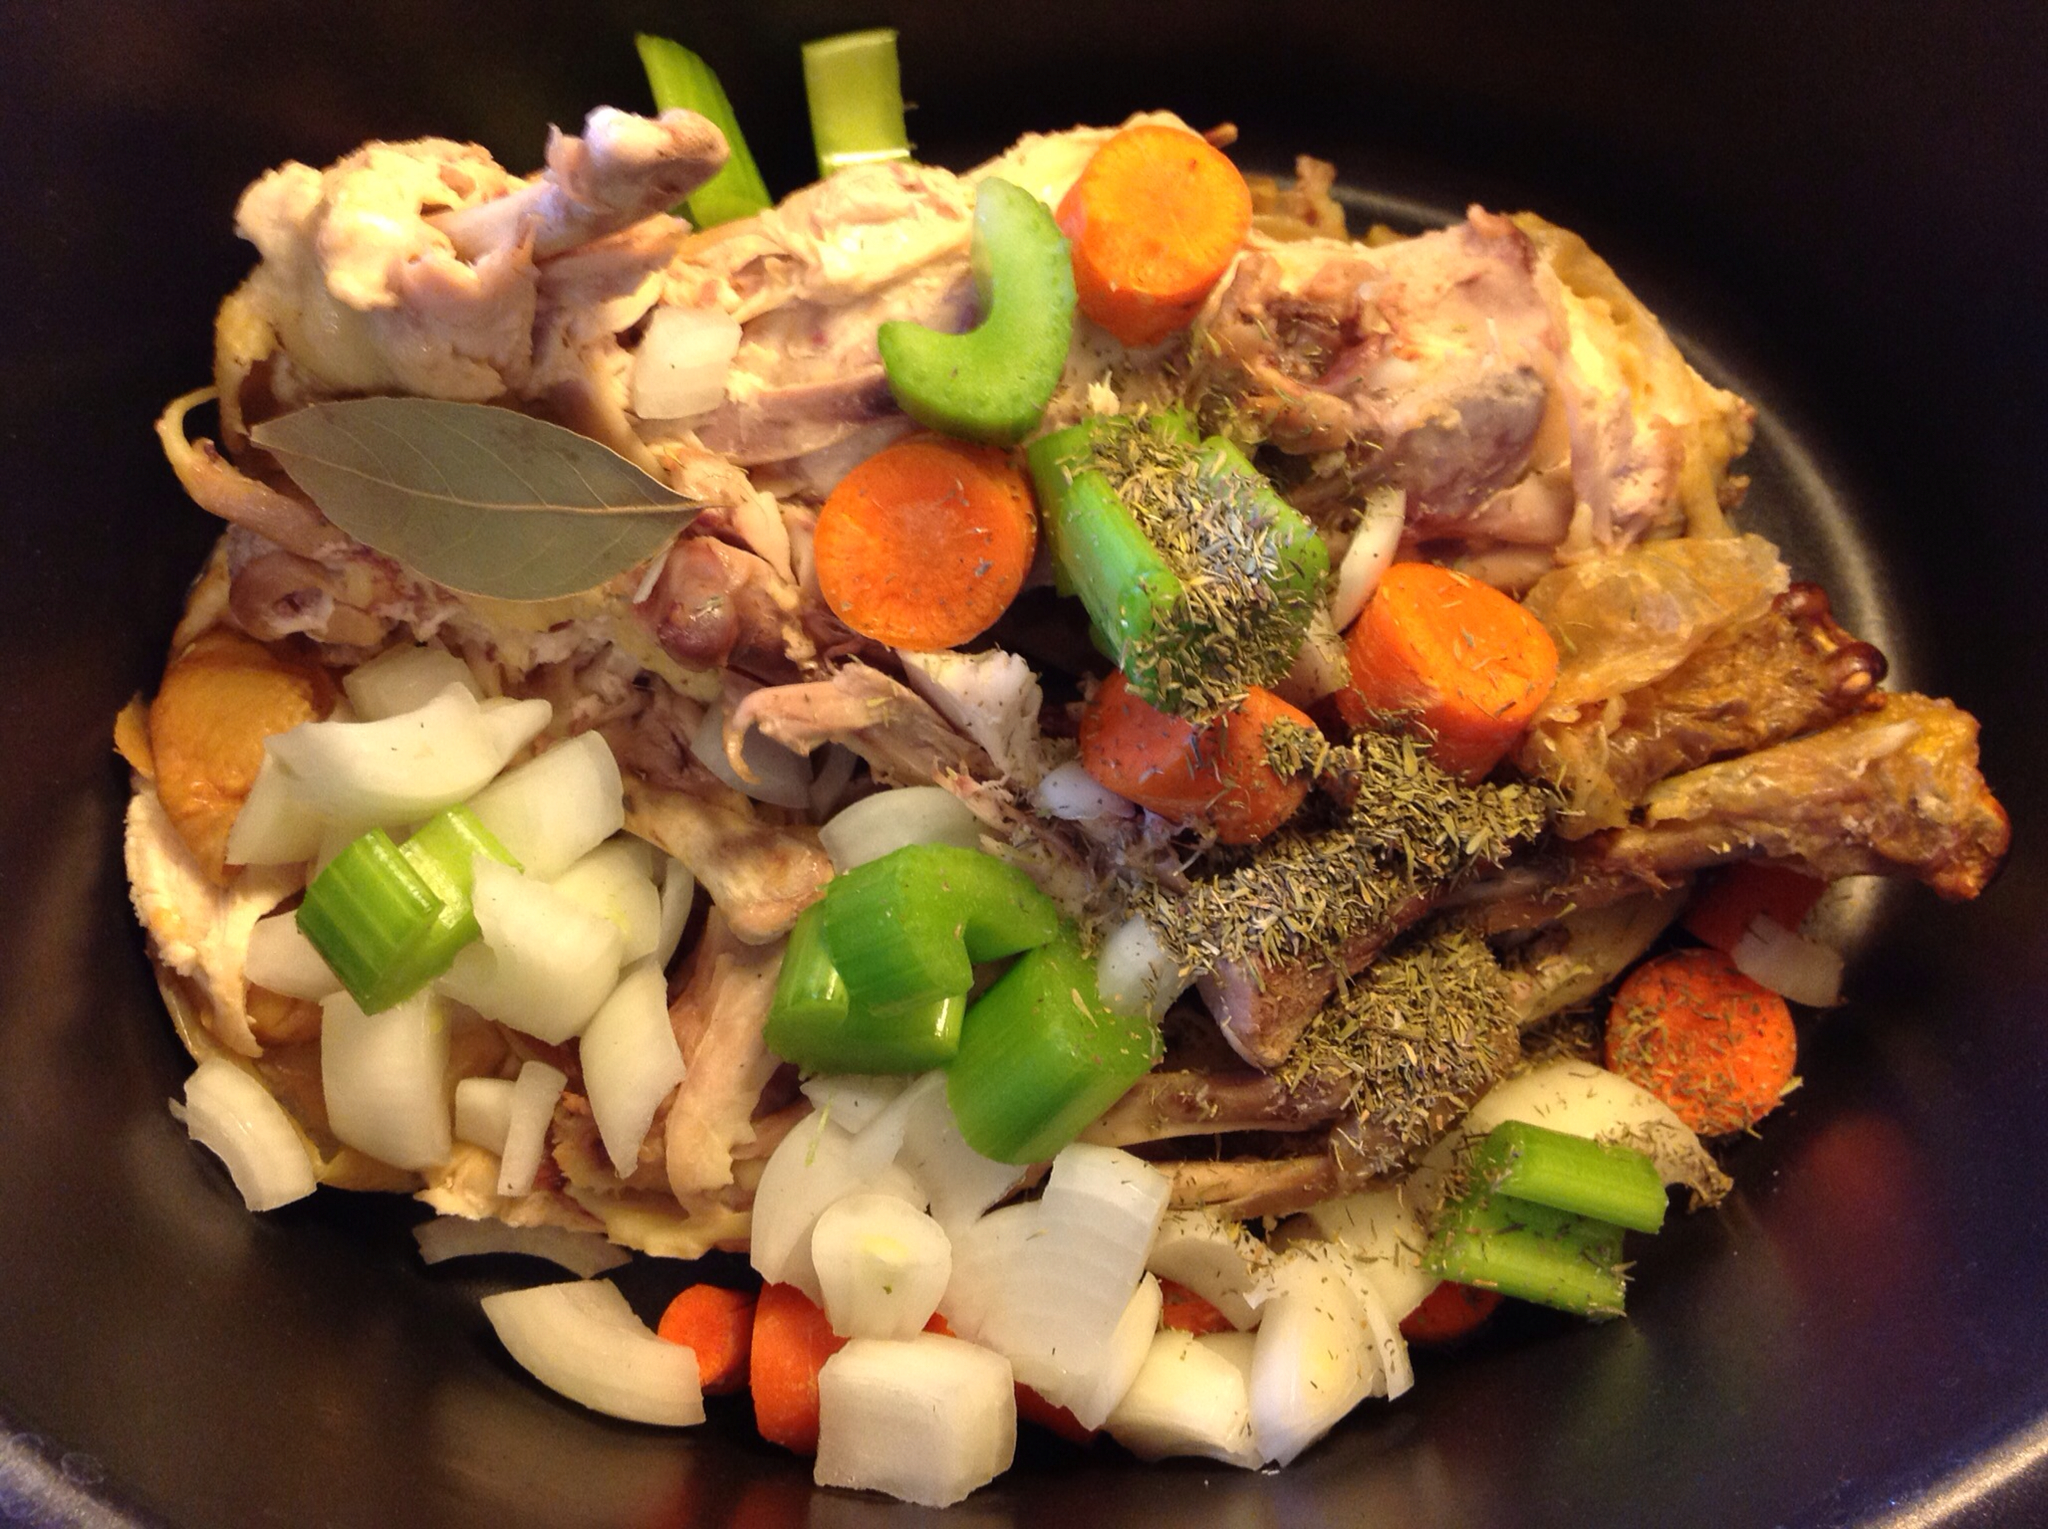
You start with the ingredients for a good stock:


  • Chicken leftovers (bones, fat, etc)
  • 1 coarsely chopped carrot
  • 1 rib of celery
  • 1 coarsely chopped onion
  • 1 bay leaf
  • Fresh thyme
  • Fresh parsley
  • Salt to taste (I do not salt my stock. I in turn, salt the soup when making it).
 

The rest? Simple. You put it all in the crock pot, add water till its about an inch from the top and set your timer for 10 hours on low. The great part? It can be done overnight or all day long.

When it's done simply run it through a sieve, and freeze the stock. I use plastic freezer jars that hold 16 ounces of liquid. This way, I simply grab a couple when I'm making soup, and the rest stays frozen until next time. I am able to get about 10 pints of stock. That's several batches of homemade soup! And the best part is you can then preserve your soups by canning them if you wish.


Saturday, October 8, 2011

Apple Cake with Cream Cheese Frosting

Ingredients
  • 3 eggs
  • 2 cups white sugar
  • 1 cup vegetable oil
  • 2 cups all-purpose flour
  • 2 teaspoons ground cinnamon
  • 1 teaspoon baking soda
  • 1/2 teaspoon salt
  • 1 teaspoon vanilla extract
  • 1 cup chopped walnuts
  • 4 cups thinly sliced apples

  • 2 (3 ounce) packages cream cheese, softened
  • 1/4 cup butter
  • 2 cups confectioners' sugar
  • 1 teaspoon lemon juice
Directions
  1. Preheat oven to 350 degrees. Butter a 9x13 inch pan. Spread apples evenly over the bottom of the pan.
  2. Beat eggs with mixer until thick and light. Combine sugar and oil and add to eggs.
  3. Stir together flour, cinnamon, soda and salt. Add to egg mixture and beat in. stir in nuts and vanilla. Batter will be very thick.
  4. Spread batter over apples in the pan. Bake at 350 degrees F (175 degrees C) for 1 hour, or until a toothpick inserted into the center comes out clean. Remove from the oven and cool. Spread with Cream Cheese Icing.
  5. To make Cream Cheese Icing: Beat cream cheese until fluffy. Beat in 1/4 cup butter, then beat in confectioners sugar and lemon juice. Spread over cooled cake. Refrigerate.
Prep Time Cook Time Ready In
15 min 60 min 75 min


Servings Calories Fat Carbs Protein
1 285 14 37 3

Sunday, August 7, 2011

Salsa!


118_3936For those of  you with gardens, you know what it means when August arrives. Tons of tomatoes and peppers. What to do with all those tomatoes and peppers? Why, salsa, of course!

Salsa is my most favorite condiment. It packs some serious flavor, with tons of nutritional content. I eat it on eggs, enchiladas, baked potatoes, in my rice, omelets, salads, chicken, the list just goes on and on!


What you need:
  • Tomatoes – whole and peeled
  • Tomatoes – diced
  • Onions – Vidalia or other sweet onion
  • Peppers – green, red, banana, mucho nacho, jalapeno, cayenne, the choice is yours!
  • Fresh cilantro
  • Limes (for juice)
  • Garlic – fresh (I was out of fresh and used powder, it’s still really good!)

What you do:

The first thing you  need to do is peel your tomatoes. Now, this is easy with the right approach. Put on a pot to boil, dunk  your tomatoes in there for about 30-40 seconds, and then immediately immerse in ice water. Let them sit in the water for about 1-2 minutes, and when you pull them out, the peels will slide right off. Just so you know, this works great for peaches, nectarines, and plums too.
118_3938

After you have your peeled tomatoes, dice the rest. I used early girl for my peels and then diced a ton of cherry tomatoes, because they were really coming in and we just couldn't keep up with eating them. You can choose what tomatoes you use. You can even used canned tomatoes from the grocery if you like.

Now, chop your onion and put it in your food processor. Add in the peppers and garlic. Blend up just a bit. Add in your tomatoes, both the whole and diced, your cilantro and lime juice. Give it a whirl around for about a minute and viola! You have salsa. Wasn't that easy?

If you prefer the taste and texture of store bought, with the "tomato puree" feel and look to it, you can add in a can or two of tomato paste, which will thicken and give it that store bought feel.

If you wanted to, after you were done with this, you could put it on the stove to cook for a bit, add in a cup of lemon juice and hot pack your salsa into half pint or pint jars. All you need to can it is a water bath, as it's on the cusp of the acidic foods spectrum. It only takes 15 minutes (20 minutes for altitudes 1000ft to 6000ft) in a water bath canner and you'll have canned salsa all year round! If you don't want to can it, you can keep it in a jar in your fridge for about a month or six weeks.

Friday, August 5, 2011

Buttercream Frosting

118_3912
 
Every year, I make at least one cake a month. During Lent, I make about 20 cakes for Church. One thing I can't live without on my cake, is buttercream frosting. Not the thick, too sweet kind you get at the local bakery, but the light, fluffy, airy kind, with just enough sweet to be yummy!


Prep Time Cook Time Ready In
7 min 0 min 7 min

Servings Calories Fat Carbs Protein
24 121 4 20 0
Cost of frosting, $1.66 (makes enough to frost a 2 layer cake)
So without further ado, here's what you'll need:

    • 1/2 cup butter, softened
    • 1/8 teaspoon salt
    • 4 cups confectioners' sugar
    • 2 egg yolk, beaten
    • 1 teaspoon vanilla extract
    • 2 tablespoons half and half or milk
    Now, if you want all white frosting, you're going to need to use the egg whites instead of the yolks.

    And here's what you'll do:

    1. Cream butter until soft.
    2. Add salt and part of sugar gradually, blending after each addition.
    3. Then add egg yolks and vanilla; blend well.
    4. Add remaining sugar, alternately with milk, until of right consistency to spread, beating after each addition until smooth.
    5. Mix on high speed for 3 minutes.  Makes 2 1/2 cups or enough frosting to cover tops and sides of two 8 or 9 inch layers.


              Friday, July 29, 2011

              Whole Wheat Cheese Calzones with Garden Veggies

              118_3792The idea of a calzone really intrigued me. I've wanted to make them for a while, but it always seemed that "I didn't know what I was doing and didn't have the time to look it up" until later. And well, we all know when later gets here. Never, right? So I decided, I'm going to do this. The idea of a pocket of food, all warm and gooey in the center with a side of marinara was too yummy to pass up.

              This time around, I chopped a ton of veggies from our garden and loaded them up with those, however, for the kids, next time around, I think I'll stick to broccoli and cheese and work my way up to more veggies from there. Kids are notorious for not liking new things and change, and being slow to accept new foods.
              Prep Time Cook Time Ready In
              20 min 30 min 50 min
              118_3776
              What you'll need for the dough:
              • 2 tablespoons olive oil
              • 1 tablespoon sugar
              • 1 cup of warm water (about 110º)
              • 2 and 1/2 cups of whole wheat flour
              • 1 TBSP of rapid rise or instant yeast
              • 1 tsp salt
              118_3781


              118_3780
              What you need for the filling:
              • 2 ounces of shredded mozzerella cheese
              • 2 ounces of shredded colby cheese
              • 1 broccoli crown, chopped
              • 1 medium zucchini, shredded
              • 1 onion, chopped
              • 2 medium carrots shredded

                Feel free to make your own concoctions! The sky is the limit when you're working with garden veggies. Add in your favorites, or throw what you have available to you in your fridge!


                What you need to do:
              1. Preheat your oven to 425º
              2. Mix together water and yeast, let sit until bubbly. 
              3. Mix dry ingredients, salt, sugar and 2 cups of the flour into medium bowl, whisk until blended
              4. Add oil into water and yeast mixture. Pour into flour mixture. 
              5. Stir until you form a shaggy dough. 
              6. Turn dough out onto your counter and add in 1/2 cup of flour as you knead for 5 minutes (or for those of you who have mixers, save your arms and use your Kitchenaid!)
              7. Let dough sit while you make the filling. 
              8. Chop and shred all your veggies and cheese and then simply mix together in a bowl. 
              9. Break dough into 6 balls. Roll out each ball into a six inch circle, and fill with the veggies and cheese mixture. Close the dough over the filling, and pinch edges together to form a pocket. Repeat with the other 5 balls of dough. 
              10. Place the calzones on a cookie sheet and place in oven to bake for 30 minutes. Turn over after 20 minutes for other side to brown. 
              11. Remove from oven, and let cool slightly before eating. 
              12. Profit!

              Homemade Ranch Dressing

              118_3788
              I'm editing this recipe. For those of you that have tried it, and if you found it to be a bit on the bland side, I've fixed that. :)

              I sautéed    the onions, chives, chopped parsley and 2 cloves of garlic in the skillet in a tad bit of coconut oil for about 5 minutes, and then proceeded to make like usual.

              Ranch dressing is a staple in this house. Like bread, or milk, or eggs. I use it on salads, the kids like to dip carrots and broccoli into it, my husband likes it. Have you ever taken a look at the ingredients list on your favorite brand of Ranch though? I have. Vegetable oil is number one. What?? Vegetable oil? Really? And disodium inosinate? What the hell is that? I really don't like eating things I have no idea what they are. So once again, I'm making my own.

              What you'll need:
              118_3785
              • Sour cream (1/2 cup)
              • Mayonnaise (1 cup)
              • Fresh chives
              • Fresh onions
              • Fresh parsley
              • Fresh garlic (one or two cloves)
              • Buttermilk (1 cup)


              Now, let me explain what I used. I used Kraft Mayo with Olive oil. It does have a couple of preservatives to make it shelf stable, and when we run out of our stock in our pantry, I'll be making my own mayo too :)  
              118_3787I used light sour cream, Daisy is the only one I can find that is made of  cream, skim milk and vitamin A. Three ingredients  that's it! Now the buttermilk. I use a powdered buttermilk that you can find in your baking aisle. Its shelf stable in your fridge for months, and you simply mix with water and voila! Buttermilk.


              118_3786Now, what you'll do. Chop the fresh herbs and garlic and put into a bowl. For garlic, the easiest way to get it out of the shell is to take your knife, lay it flat side on top of the clove and give it just a light tap. You should hear it open up. Then just peel the skin off and chop it right up!  Add the sour cream and mayo. Stir it up a bit. Its going to be very thick. The buttermilk is what is going to thin it out and make it dressing like. Now, mix up your buttermilk and add it in, whisking the whole time, until you get the consistency you like. I used 2/3 cup of buttermilk, and it gave me a creamy, yet not too thin texture.

               Now, simply profit from your latest creation!


              Thursday, July 28, 2011

              Playdate Pretzels

              If you're kids are like mine, they just love to help in the kitchen. Well, here's an easy recipe, that's fun for them as well as for you! Homemade, 100% whole wheat pretzels.

              Feel free to dust with sea salt, or cinnamon sugar before you bake!


              Here's what you'll need:


              • 1 and 1/3 cup of whole wheat flour
              • 1/2 cup of water (110º)
              • 3 tsp of yeast (or one pack of yeast)
              • 1 tsp of salt
              • 1 TBSP of sugar


              Preheat oven to 425º and line a pan with wax paper and use a pastry brush to lightly coat with olive oil.
              1. Mix the yeast and sugar in the water, and let sit for about 5 or so minutes, until it mixes and becomes foamy. 
              2. While you're waiting on the yeast, mix together the salt and whole wheat flour. 
              3. When the yeast is ready, pour the water mixture into the whole wheat and mix flour until shaggy. 
              4. Turn dough out onto counter and knead for about 5 minutes. 
              5. Cover with a dishtowel or cloth napkin on your counter, and let rise for 10 minutes. 
              6. Roll dough into a snakelike shape, between your hands and the counter, until it's about 12 inches long and 1/4 inch wide. 
              7. Make into any shape you wish, letters, numbers, geometric shapes, or you can just use the standby pretzel shape. 
              8. Bake for 10 minutes. Remove from oven, let cool for 5 minutes. 
              9. Enjoy! 


              Wednesday, July 27, 2011

              Homemade Brownies!

              If you're like me, boxed mixes from the store just don't do it. The use of white flour, preservatives, additives, colorants, etc, all make for a brownie or cake that might taste good, but is chock full of things I cannot pronounce. If I can't pronounce it, the kids nor me or hubby eat it. Period.

              So, like many of you, I make brownies and cakes from scratch. For those that don't, I'm sure you're thinking "but how long is that going to take you? I just dump my brownie mix, add a couple of things to it, and bake it!" You might be surprised to know that brownies only take a few ingredients. A chocolate, sugar, an oil/butter, flour, and eggs. I even use 100% whole wheat flour, and my family loves them! So let's get to it shall we?

              What you'll need:


              • 1 stick of butter (1/2 cup)
              • 2 squares of unsweetened baking chocolate
              • 2 large eggs
              • 1 cup of packed brown sugar
              • 1/4 tsp of almond or vanilla extract
              • 1/2 cup of whole wheat flour


              Optional:

              • 2/3 cups of chopped semi-sweet chocolate
              • 1/2 cup of slivered almonds or chopped walnuts, or the nut of your choice


              Instructions:
              1. Preheat oven to 350º. Grease an 8x8 pan, and set aside. In a small saucepan, melt the butter and chocolate over low heat, stir continuously  until blended completely. Remove from heat, set aside to cool. 
              2. In medium bowl beat eggs and brown sugar until blended, stir in melted chocolate and your vanilla extract. 
              3. Add flour and stir. Stir lightly, if you stir too hard, or use a whisk, you'll risk getting air bubbles and they won't be as dense! If you've chosen to add an optional ingredient you'll stir that in now. Pour batter in pan and spread till even. 
              4. Bake 25-28 minutes or until firm in center. Cool completely before cutting. Makes 16 bars. 


              Monday, July 18, 2011

              Homemade Yogurt


              This is our original tutorial on making yogurt, but we've bettered it! I've found that the kids love orange, vanilla or other extracts in the yogurt with a small amount of honey. Honestly, it tastes just like Greek Gods yogurt IMHO, but is half the price.

              Great thing about this yogurt is you can add in anything you want!


              What you'll need:
              • Milk (the higher the fat content, the creamier it will be, I used 1%). Raw milk would make a great greek yogurt too!
              • Yogurt starter (I used Fage 2%), you'll need to get some without any additives, something organic if you can. You can also use freeze dried starters like Yogourmet.
              • Crockpot
              • Heating pad
              • Candy or meat thermometer
              What you'll do: 

              You start by heating the milk to 180º. Now this is important. You'll want to make sure you heat it up till it gets foamy on top. This will kill any bad germs right outta this milk. After this, either put the pan in in some ice water (be sure to not get water in your milk!) or you can just set it aside. When it reaches 110-115º, you're ready to go. I just filled my sink with ice water and set the pan in there, sort of like a double broiler, it took about 5 min to cool down.
              000_0001
              Next, you'll add in your starter. Now, how much milk you've used will determine how much starter you'll need. For every half gallon of milk, you'll need tbsp of starter yogurt. I used an entire gallon of milk and an entire carton of Fage 2%. Stir it up good now.
              000_0003
              Next, set your heating pad to Medium. Mine has four settings, warm, low, med and high. High was able to keep my yogurt at 112º for 8 hours. Also, if yours is like mine, you'll need to keep turning it on once every couple of hours, as it has an auto shut off. Also, make sure to put the heating pad on a cutting board and not on your counter, you don't want to ruin your counter! 000_0002

              So, just shut the lid, cover with a towel and you're ready to go! Come back 8 hours later, and you'll have yogurt! Now, I went a step further. I tripled some cheesecloth, and put it in a colander, and then added the yogurt and let it drain overnight in the fridge. This drains the whey from your yogurt and takes it from being a runny thin yogurt to a creamy greek goodness. 8 hours in the fridge or so, was plenty. I also used the whey to water the tomatoes in my garden, which helps keep blossom end rot at bay.
              .